

Mac find large files to free up your precious space. Especially on modern Macbooks where it is not possible to upgrade your hard drive. Storage space is expensive on some computers. Identifying large files will make you able to save some space on your Mac disk.
There are several ways where you can find those large files. Apps can be large files. Xcode is a single app file at about 30GB. iMovie app is almost 3GB. And there are other huge apps. If you have an iPhone and use your mac to storage a backup those backups will take up a lot of space.
Mac find large files
Method 1: Checking the usual folders
If you have an iPhone you want to check out the backup folder. You find that here: ~/Library/Application Support/MobileSync/Backup
The next folder you want to check out is the Application folder. After you have opened the Application folder, just click the Size tab so you sort by the largest applications first. The Application size can vary from 1MB to several GB.
Method 2: Using Search in Finder
You can use Finder to find all files above a specific file size you decide. There are a few simple steps, but not so obvious if you haven’t done it before.
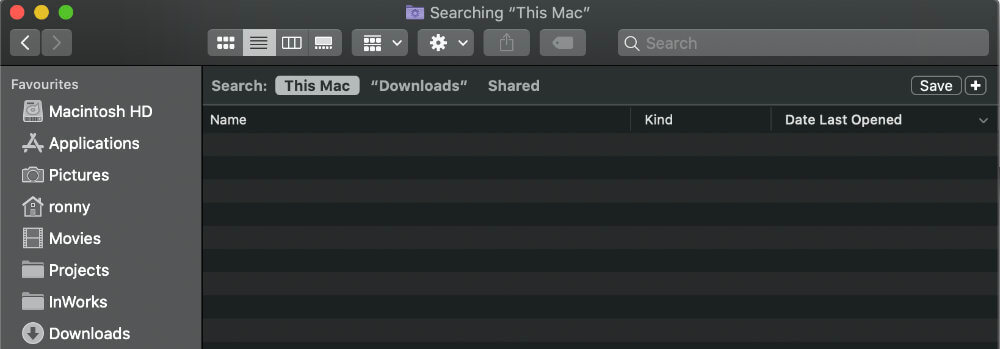
1. Open the Finder
2. Click “Show items in a list”
3. Press Command + F, to open the search options in Finder.
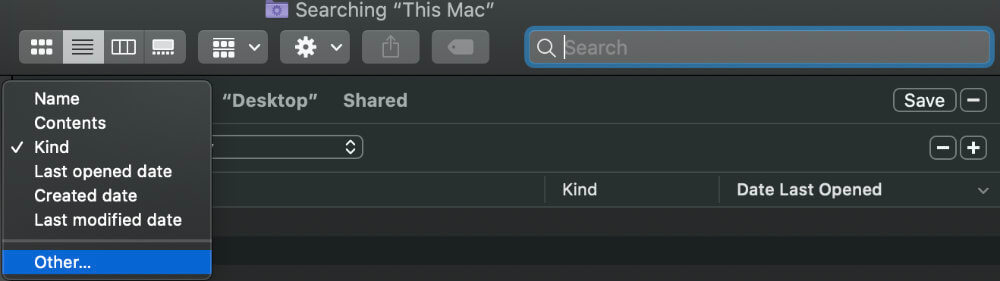
4. Click on “Kind” and select other. Which will open a new menu on what search attribute you want to search for.
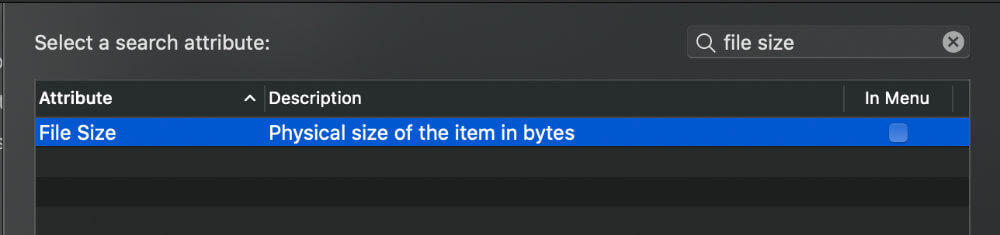
5. Select “File Size”.
6. Select “Equals” and select “is greater than”.
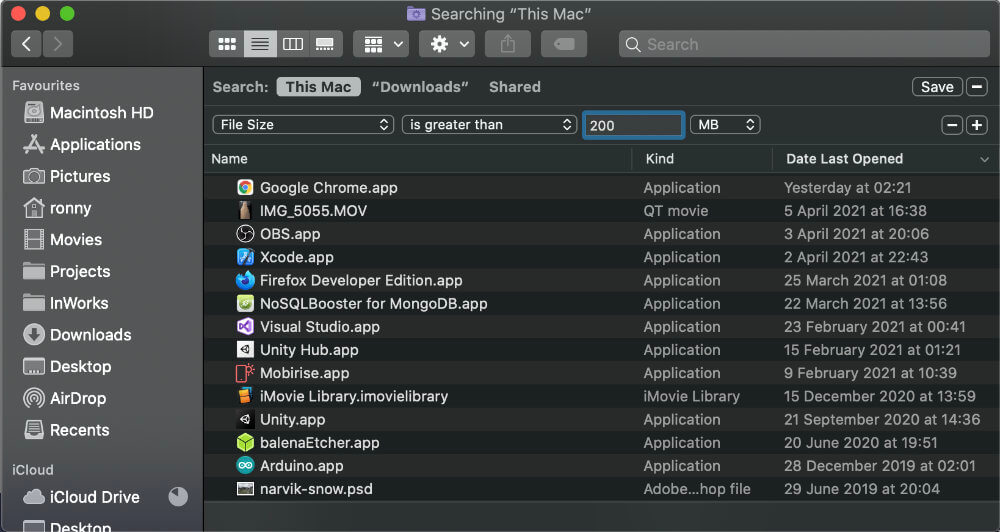
7. In the next field you can select the size. The default is kB, but you can change that to MB or GB instead. Select the size you want. Try in example 500MB. This will give you all files larger than 500MB.
This window doesn’t have the file size tab so you can sort the files by file size. What you can do instead is click the “Change the item grouping” and select size. This will sort the files by file size.
Method 3: Using storage management.
A third option to find large files is to use the Storage Management tool. This is for macOS Sierra and later only. There are three ways to open the Storage Management tool. Here are the three methods to open the Storage management tool.

Method 1: Spotlight search
Open spotlight search by clicking Command + Space. Then start typing “Storage Management”. Open the app.
Method 2: Open from Finder
In the Finder window double-tap (or right-click) Macintosh HD in the left pane. Then select “Manage Storage”. This will open the Storage Management app.
Method 3: From the Apple Menu
Click the Apple icon in the upper left corner and select “About this Mac”. Then select Storage and click the “Manage…” button. This will also open the Storage Management app.
When you have opened the Storage Management app you have some categories in the left pane to select from. It doesn’t give you access to all folders, but you have access to the following: Applications, Documents, iCloud Drive (requires you to log on), iOS Files (iPhone/iPad backups), Mail, Messages, and Music. You can have access to all files if you click Documents and then File Browser. In this view, the total space used is listed after each folder name. Very convenient to hunt down large files and space wasters.
At the top of the left pane, you have Recommendations. There you have easy access to set up automatic deleting the trash bin when the files have been there for 30 days.
Method 4: Using the terminal
Getting your mac find large files using the terminal will take a few minutes. Unless you are a good friend with your terminal window it might take some memorizing. Anyway, it’s good to know about, so let’s have a look at it.
This method won’t exactly find the larges files but the 10 largest directories. It might however give you a good idea of where your largest files are, and where you can find files to clear some precious hard drive space. Remember, it will take a few minutes before your Mac gives you the result. Just be patient.
du -h | sort -rh | head -10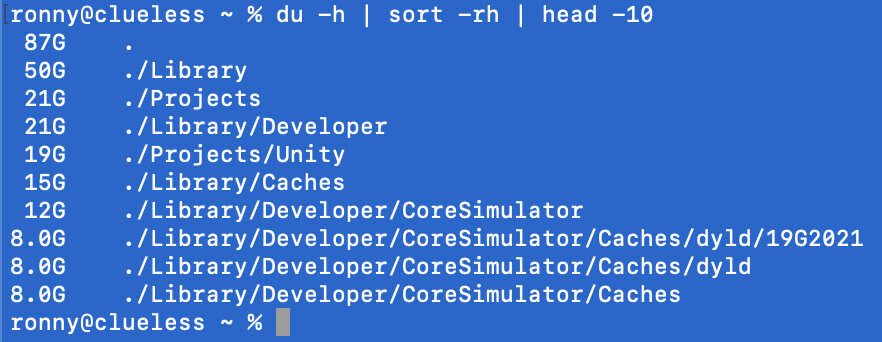
Let us break down the command you entered.
du – Means disk usage.
-h – Means human readable. So instead of giving you the space used in bytes, it used M (for MB, or MegaBytes) and G (for GB, or GigaBytes).
| – Means you will enter another command your want to run together with du command. The correct terminology is a pipeline (a sequence of commands) On my keyboard it’s on Option + 7.
Sort – This is the sorting command that will sort the list for us. To make it work like we want we need to give it a few parameters (-rh).
-rh – the r means to reverse and the h means human numeric sort.
Head – The head command is usually used to display the beginning of files. But when it’s used in this sequence or pipeline it will limit the result to 10 directories with the -10 parameter. -20 will give you the 20 largest directories. If you don’t use the head command it will give you the size of every directory on your computer. That’s going to be a very long list.
Mac find large files – Using Softwares
Software 1: Disk Inventory X
Disk Inventory X is a Mac OS X disk usage utility. It uses a graphical method known as “treemaps” to display the sizes of files and directories.
If you’ve ever wondered where all your hard drive space has gone, Disk Inventory X will help you figure it out.
Disk Inventory X is free and can be downloaded from their website.
When you start up Disk Inventory X it will ask you which drive to scan. Then it takes a few minutes to scan your hard drive. So just be patient.
Once it’s done scanning your drive, it looks something like this.
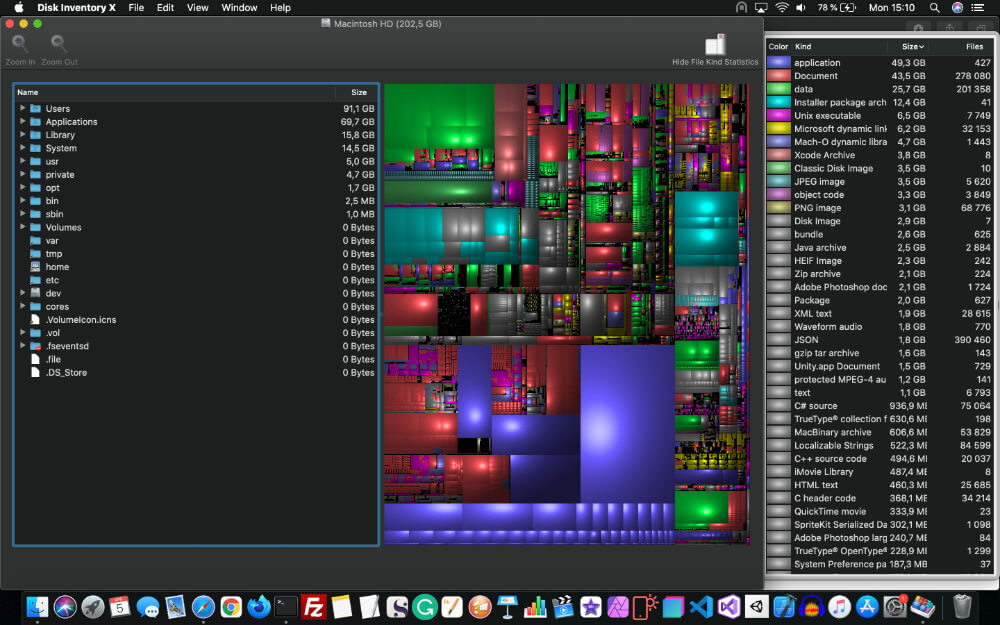
The list to the left is directories and it shows how much data they contain. The middle view shows every file as a colored box. The right pane tells you what the different colors are, and if you click one of the boxes it will show up in the left pane. If you right-click or double-tap on a MacBook, you can choose to reveal in Finder. There you can delete, copy, move or do whatever you like with the file.
I can recommend Disk Inventory X. It is easy to use, does its job, and is free.
Software 2: DaisyDisk
I am not affiliated with DaisyDisk in any way. It is not free, but you can download it and use it in trial mode. It only cost €10.99 or $9.99 depending on where you are. After some time it takes a bit longer to load it in trial mode. You have to wait to load the program. One of their tricks to get you to buy it.
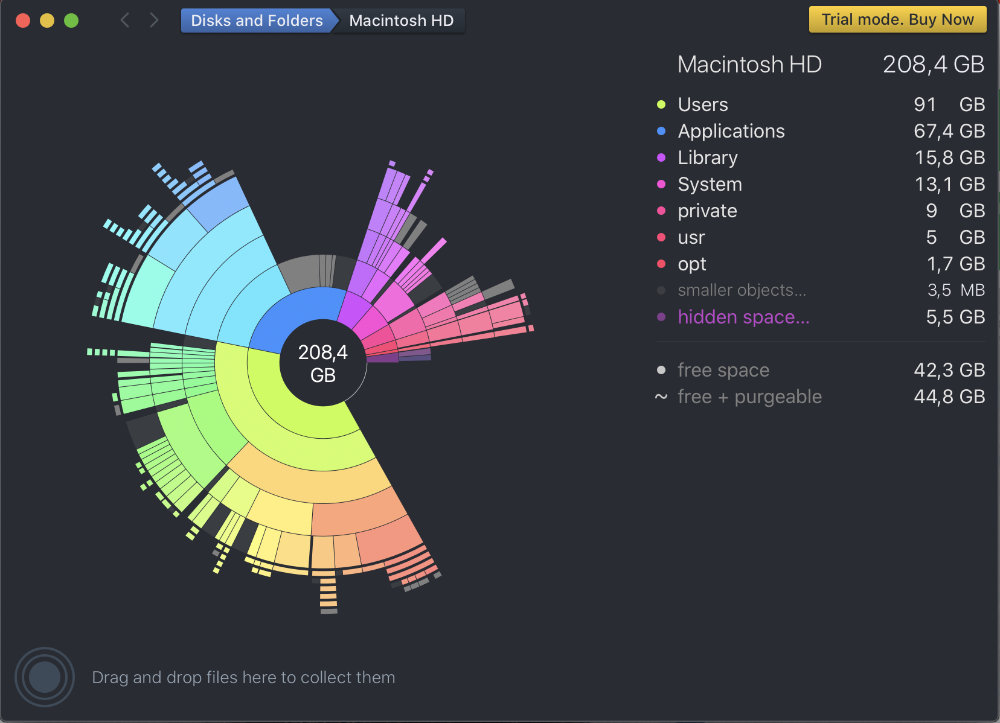
Same as with the previous software, when you start it you select which drive you want to scan. And it uses a few minutes to scan your drive and display an interactive circular map displaying the files. On the right side, it will display how much data your common folders take up, like Library, Documents, and a folder display for large files. Some features like Large files are only available if you purchase the software.
DaisyDisk is one of the most popular alternatives to Disk Inventory X.
Software 3: Grand Perspective
Another alternative software for finding large files on your mac is Grand Perspective. Grand Perspective is similar to Disk Inventory X. Same type of map with the colored boxes for files. However, it has a few interesting options. It has a map view to show when the files were created. It even has a map to show compatibility. This is only supported in Mojave.
Grand Perspective is free to use and open source.
Software 4: JDiskReport
JDiskReport allows you to see how much space your files and directories take up on your hard drives, as well as find files and folders that are no longer needed.
The tool analyzes your hard drives and compiles a number of statistics that you can display in the form of graphs and tables.
This app is ad-free, unrestricted, and never expires.
JDiskReport is compatible with Windows, Mac OS X, Linux, and other operating systems. Java is needed.
JDiskReport is free to use, but not open source.
Mac find large files – More alternatives
If you still want more alternatives, check out this link to alternativeto.net
Cleaning your Mac can make it faster